
7 basic tips for photographing the Milky Way

The first time you turn your eyes to the sky and see the colorful Milky Way lighting up the heavens, expect to gasp in awe as I did. Stars are impressive enough when you get to a truly dark sky location, but the Milky Way, with its dense core of dancing pinks and blues, is a sight to behold, especially if your goal is indeed photographing the Milky Way.
Astral and night photography is an art that many spend their lives learning and fine-tuning –- I have found a passion in photographing the night skies, a love that is enhanced by the glory of being outdoors with the silence of the night and all those stars. I don’t think you ever perfect the art of night photography. So if you want to photograph the Milky Way, expect the quest to be a never-ending educational journey. That is one of the attractions of night photography for me; it’s a thinking person’s activity.
Ready to start your photo journey with the Milky Way and stars? Begin by reviewing the gear suggestions and camera setting guidelines below. Don’t forget that “guidelines” is the operative word. This is an art, as I said, not a science. There is a suggested starting point, but you then have to use your head to make changes, and you will find a lot of variations on this so-called starting point if you look around. First, though, you’ll need to move beyond your smartphone, although with the right camera app, you can get something admirable enough. Oh, but you want more than “admirable enough,” right? Then read on.
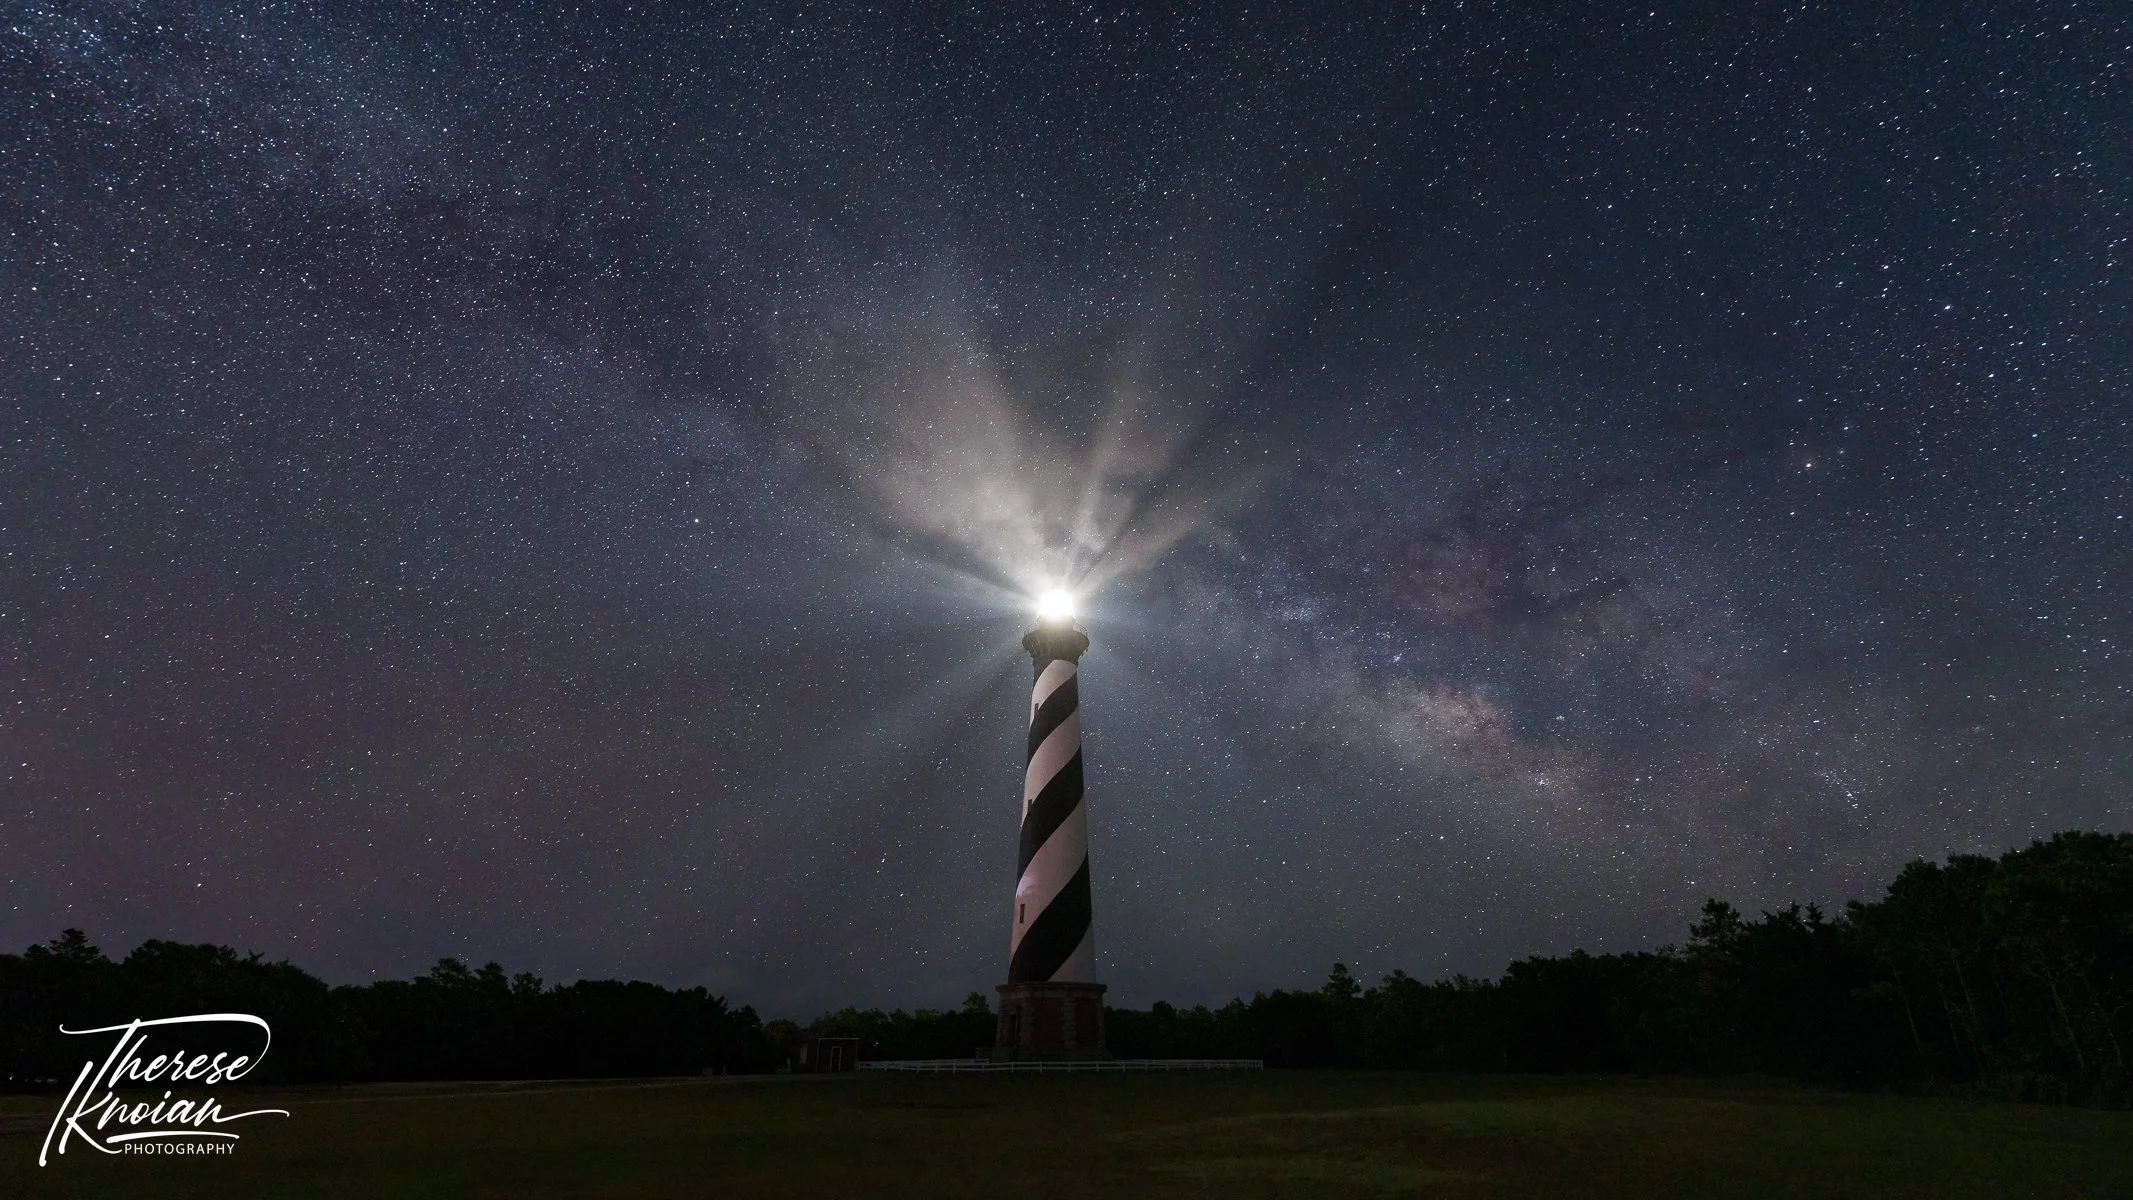
Cape Hatteras Lighthouse on the Outer Banks of Maine offers enough darkness for the Milky Way core to shine, with the added touch of the lighthouse's beams in the sky.
Gear you need for photographing the night skies
Photographing the Milky Way isn’t all that difficult once you know the basics, but do remember that rules are made to be broken. That’s where the thinking and the process of lifelong learning come in.
Below, you’ll find seven basic tips to get you started photographing the Milky Way and the night sky. But be warned: When you are out enjoying the quiet of the night and the beauty of the galaxy overhead, it’s easy to get bitten by the night photography bug, as I was. First, though, ensure you have the right gear and accessories:
When it comes to snagging impressive night and astral photos, it’s essential to have a camera that allows you to adjust settings precisely, including aperture (also known as F-stop or how wide open the lens is), shutter speed (how fast it takes a photo), and ISO (how sensitive the camera will be to available light).
You will also need a tripod since the length of the exposure will be a few seconds or much more. Holding your camera in your hands will mean you’ll get blurry everything. When stars and skies are sharply focused, that’s when the oo’s and ah’s really start.
To trigger a shutter for a longer exposure without pushing the camera button by hand, which can cause the camera to shake, you will also want to have a remote shutter release that attaches to the camera by a cable or via Bluetooth. Call me old-fashioned, but I personally stick to a cabled version since there are still things that can go awry with a Bluetooth connection. I for one do not want to lose a connection part way through an hour or more of photos and have to start over.
If the Milky Way is your goal, you need to determine when it is visible where you are. By visible, I mean the central area, or that really colorful area called the “Galactic Core.” Although many will strive for that hovering core overhead, I am not against the less sparkly part of each side of the core and its density of stars. Generally speaking, in the Northern Hemisphere, the core will be visible from about mid-spring to mid-fall, although it can appear earlier or later, depending on where in the world you are, and what time you might be willing to go looking. Of course, the sun has to be down with full darkness to see it properly.

Easter Island, a.k.a. Rapa Nui, is another dark-sky area, though you do need a guide and permission to enter the areas with the moai statues. As you can see here, there isn’t a strong “core,” but it is still a wonderful Milky Way shot with the moai in the foreground.
Location is also key. You also won’t see it as well when the moon is full, or there is too much light pollution. Do yourself a favor prior to heading out and check out an area’s extra light on a light pollution map for better night photography choices. Plus, seek some kind of foreground, from water to mountains or trees, to make the Milky Way even more impressive.
Basic settings for photographing the Milky Way
Once you have the right gear, apps, accessories, and timing, it’s time to start shooting:
Use a wider-angle lens, such as 14-20 mm. A wider angle will usually collect more light. And since photographing the Milky Way is all about collecting light, that’s a good thing.
Change the camera to manual mode so you can adjust everything yourself.
Plug in your wired shutter release or connect your Bluetooth remote (if you choose that type) so you can release the camera shutter without any jiggle.
Set the ISO to 6400 (you may later try moving that lower or even higher, depending on the darkness). Bigger numbers mean more light sensitivity, but also the chance for more “noise.”
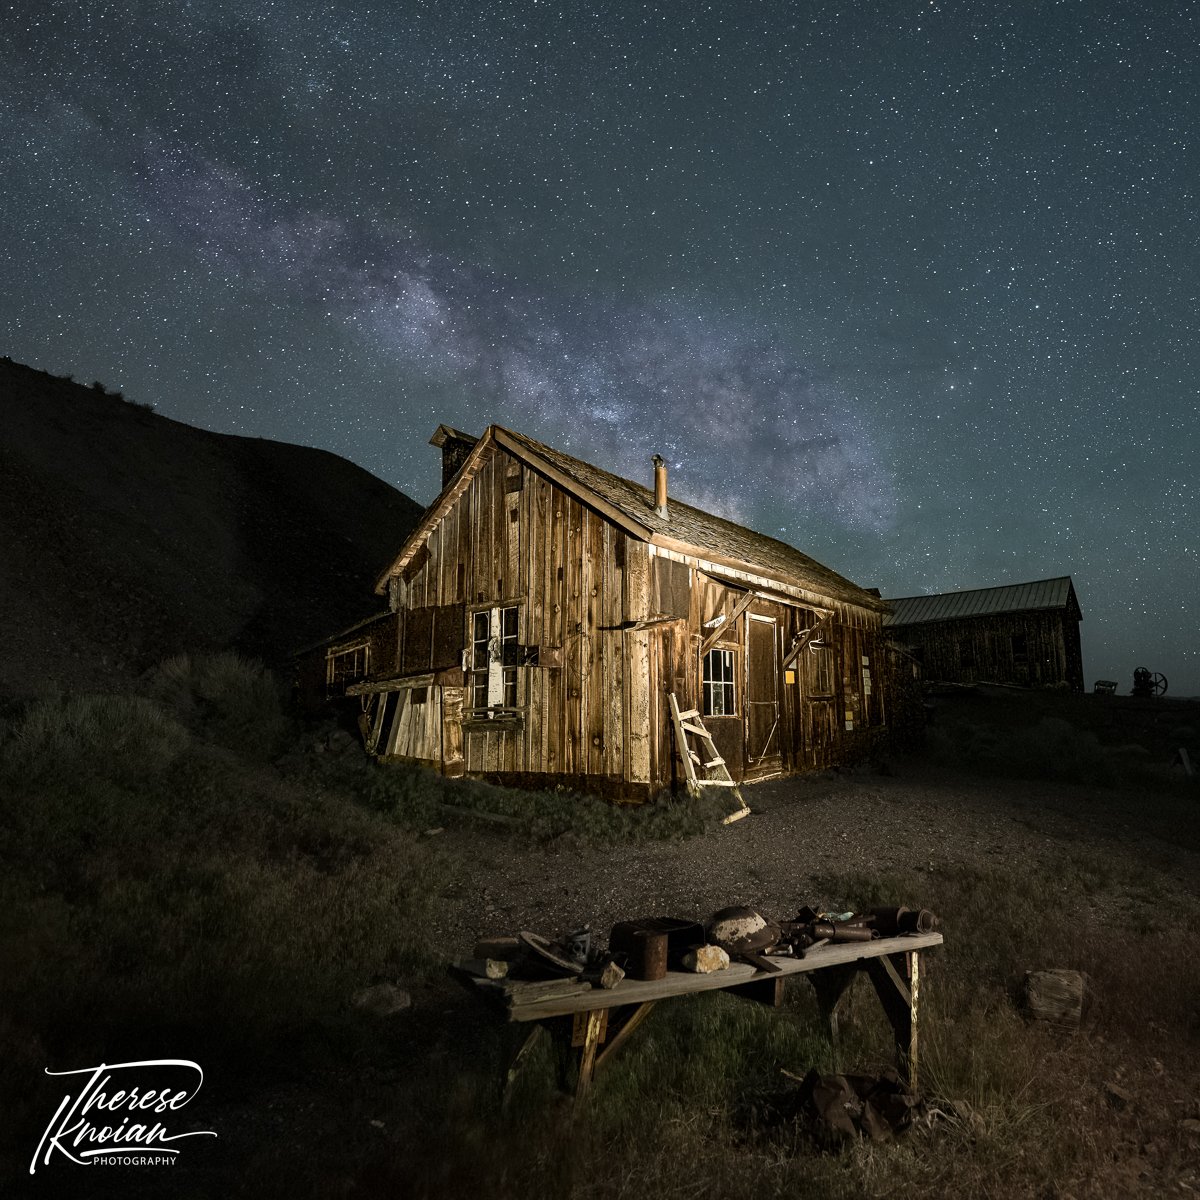
In the very remote ghost town of Berlin, Nevada, I was able to light-paint the old, abandoned structures in the foreground.
Set the aperture to F/2.8. Smaller numbers mean wider aperture and thus more light. Of course, I am also hoping that your lens is a so-called “fast” lens, meaning you can change to a wider aperture at or below F/4.5. If you do not, the photo’s look will change, but you can also add light by selecting a higher ISO. There are of course exceptions to the F/2.8 guideline depending on your focus needs, but that’s another chapter!
Shutter speed is pickier. Milky Way photographs are not super long exposures since the stars are moving surprisingly fast, and you don’t want streaks, you want sharp points. How fast you set the speed will depend on your lens and other factors. It may be a few seconds or even up to 20 seconds. Unless you have an app that helps you determine that length, you can just start experimenting. Start with 15 or 20 seconds. After a shot, zoom in on your camera monitor to see if the stars are elongated or actual points. If not a real star point, then make your shutter speed shorter, such as six or eight seconds. If there is not enough light, but you still have points, go longer. Then check again to find the right balance or light and sharpness for your camera and lens.
Focus is king. This is even trickier. You can set the camera for infinity, which can work, and many people do just that. You can also focus on a bright star by zooming in. If you have foreground, you’ll need to find a point that allows both the stars and the foreground to be in focus. Again, until you are more advanced, you may want just to try taking some shots, then looking at them to see where you need to adjust.
Now, start shooting and experimenting, taking a number of shots with different scenes, lights, and lengths. Look at them zoomed in on your camera monitor to see what you think you should change. Remember, this is a digital world, so you can always delete.

And now you get to see my very first Milky Way, shot as it hovered behind the Marshall Point lighthouse in Maine. I can still feel the thrill of seeing the Milky Way appear on my camera’s screen – I think I yelped in excitement. It may not be my best, but it holds great memories.
Processing your Milky Way photos
Of course, taking the photos is the first step. Adjusting them using photo editing software such as Lightroom or Photoshop is yet another art and yet another learning process.
After taking a photo, you will need to adjust the tones and perhaps also the so-called “white balance,” and bring out a few colors in the Milky Way, too. There are free programs to get you started.
These tips will help you get a feel for photographing the Milky Way, stars, and galaxies. Remember, though, the complexity of what, when, and how to shoot goes much deeper. Start dabbling and see how excited you get when you see the potential. Not to mention the shriek of joy when you nail your first Milky Way shot.
About the cover photo: If you can get to a truly dark sky area, like Nevada’s Massacre Rim Dark Sky Sanctuary, the stars and Milky Way will truly pop. The area is so vast that I had to search for something for the foreground – and a blooming lupine bush fit the bill.