
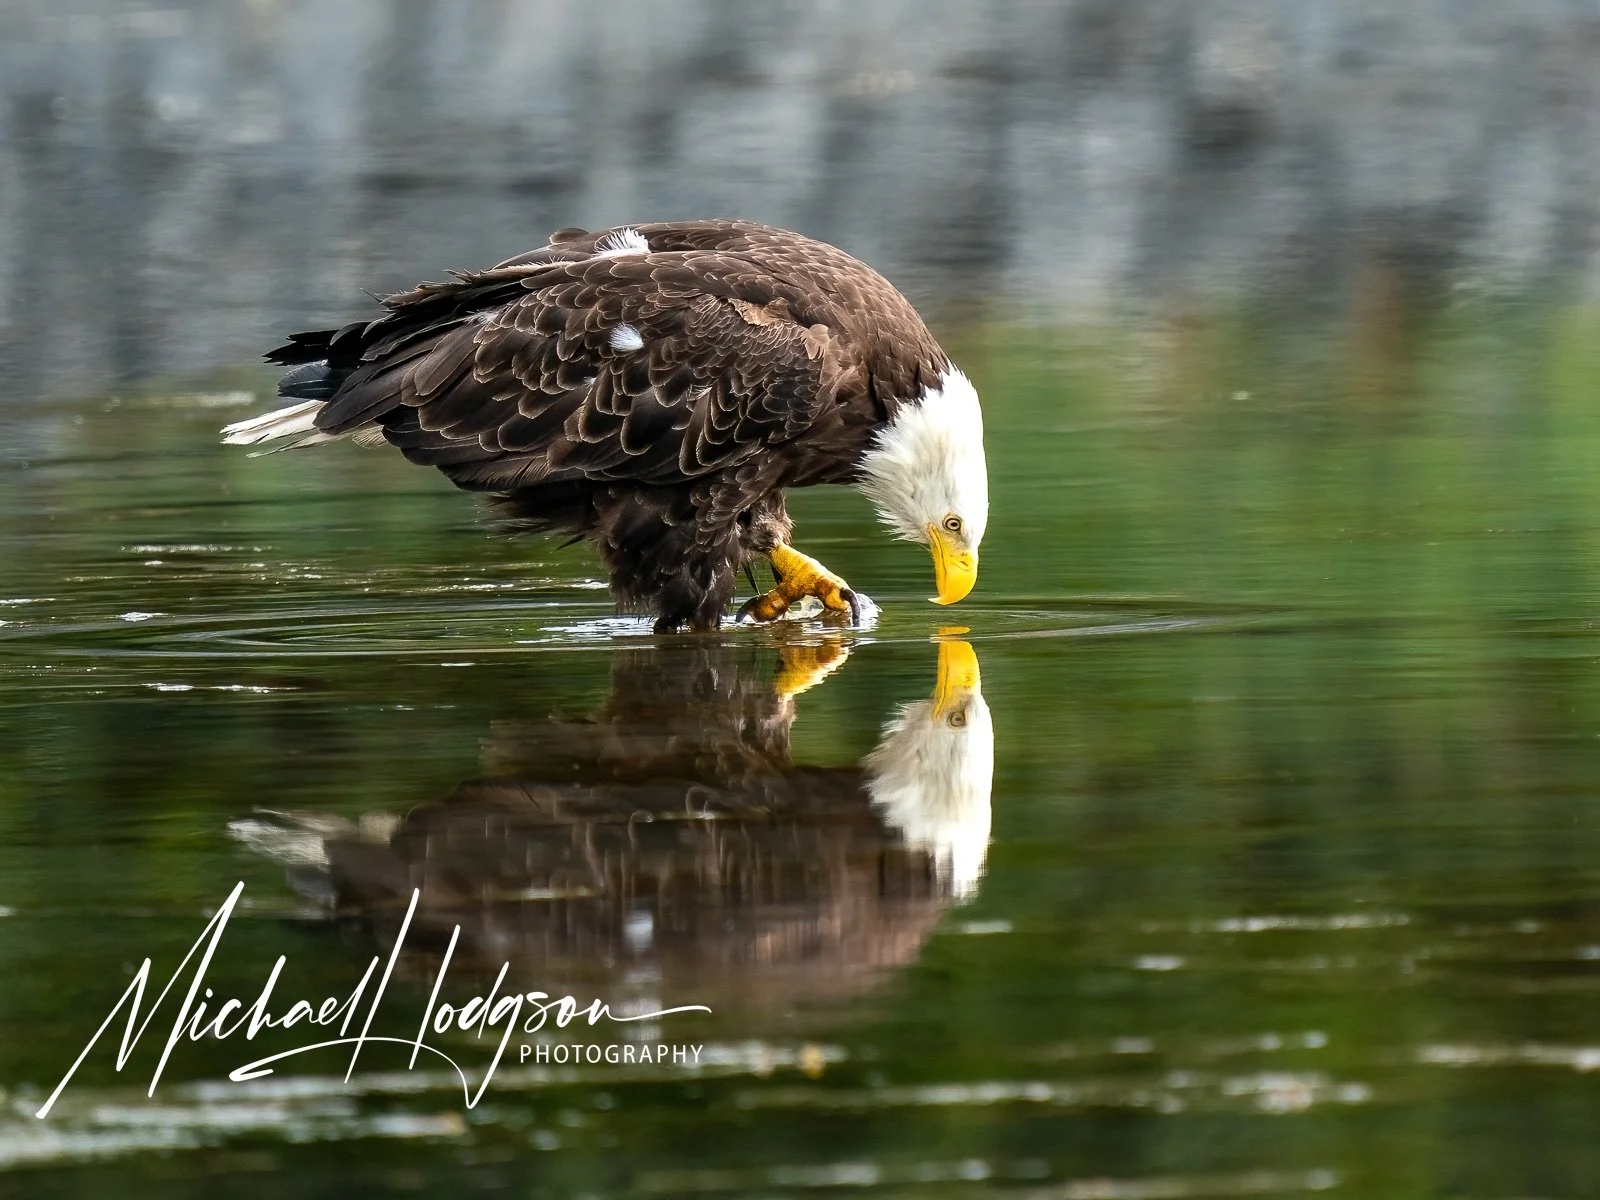
Taking better wildlife photographs isn’t simply a matter of owning an expensive camera or a long telephoto lens. Whether you’re photographing birds in your backyard, bears in Alaska, or lions on an African safari, understanding animal behavior, choosing the right camera settings, and anticipating action can make an enormous difference.
Wildlife photography has been a passion and a calling for me ever since I purchased my first camera, an Olympus OM-1, in 1978, before heading off to Kenya for a college semester abroad. But here’s the thing: Until just a few years ago, too many of my wildlife photos were of animal butts, slightly fuzzy, or just snapshots of a bird on a branch or a lion taking a nap. None were impactful in any way and often left me feeling disappointed – in the photos, not the experience.
That is, until I started studying the works of wildlife photographers I loved and began reading articles by experts offering simple wildlife photography tips I could immediately put into practice. Before long, I was taking wildlife photos that I was not only proud of, but ones that began to win awards and recognition.
The tips here assume you already know the basics of composition and lighting. And, you’ll want to have at least a basic DSLR or mirrorless camera and a basic zoom lens. I know I’ve talked about how excellent smartphone cameras are these days, and I frequently rely on mine as a backup or stealth camera when traveling. But for wildlife photography — at least if you’re trying to get images that move beyond a nice snapshot – you’ll want to have more than a smartphone in your hand.
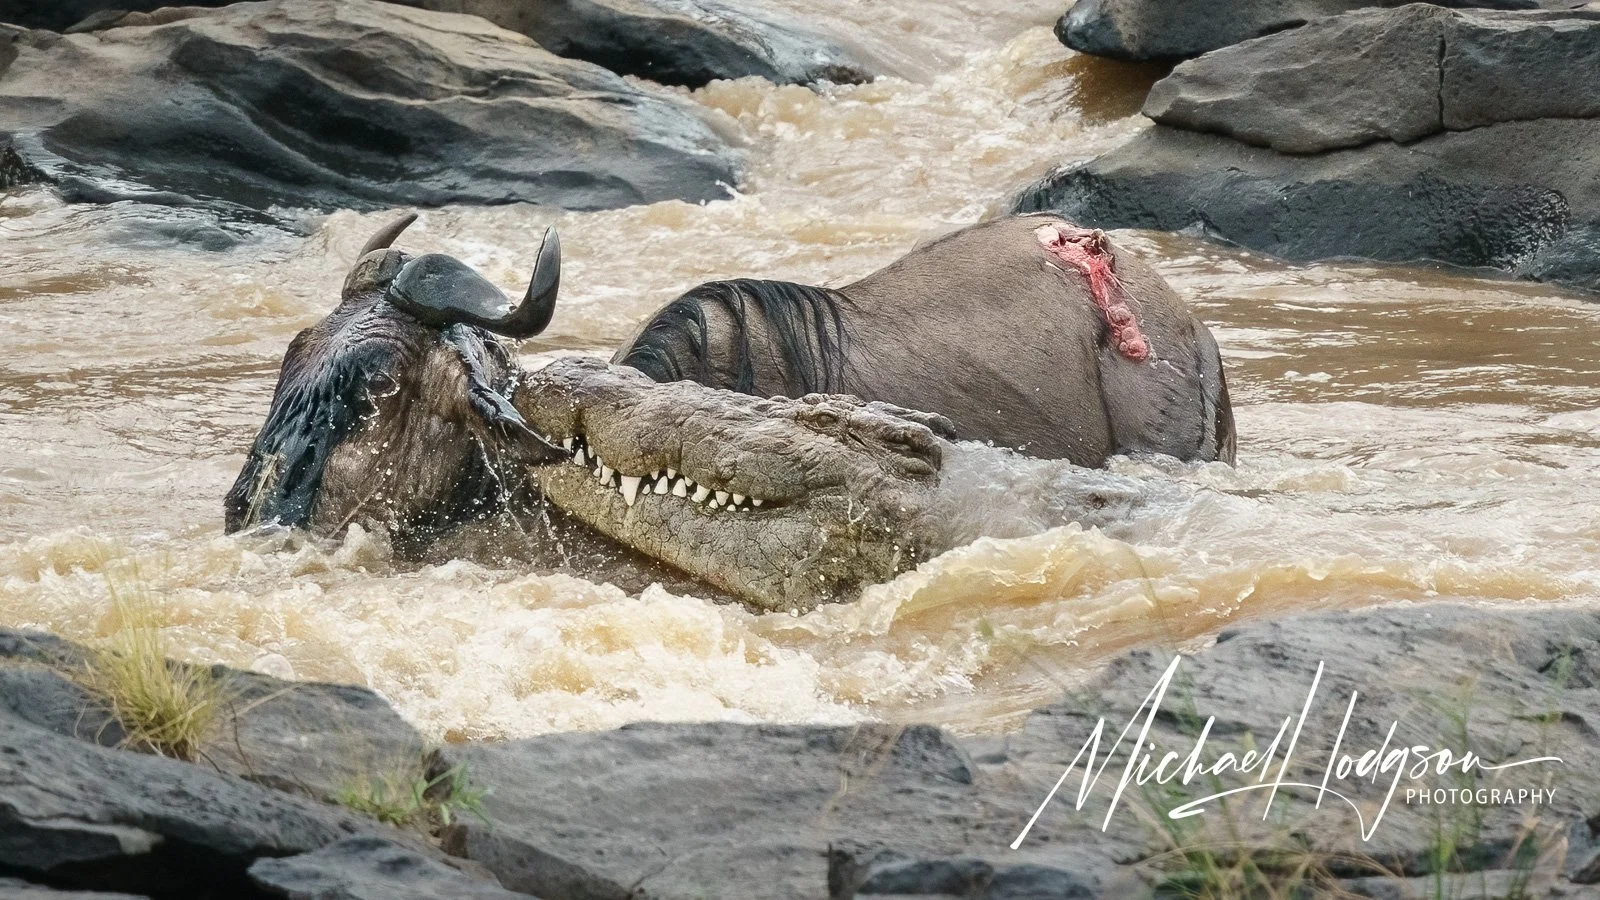
A Nile crocodile attacks a wildebeest during a Great Migration river crossing in Kenya’s Maasai Mara. A 200–600mm telephoto zoom lens allowed me to photograph the action from a safe distance while keeping the animals prominent in the frame. Photograph © Michael Hodgson. View photograph and print options.
Read on to learn a few wildlife photography tips that help me consistently capture memorable photos of the wildlife I encounter.
Know your wildlife photography camera settings
Wildlife will not wait for you to finish fumbling with your buttons and settings. You need to change your focus settings, aperture, shutter speed, and ISO quickly and smoothly, all without taking your eye off the viewfinder. You'll need to do all this while keeping your subject in the frame. It takes practice, believe me. In the photo below, during the Great Migration in Kenya, the wildebeest herd suddenly surged toward the river. I had no time to fumble with my camera settings, and the light changed as the herd moved. The only way to capture this shot was to keep my eye glued to the viewfinder and make my camera adjustments as needed without looking at buttons and dials.
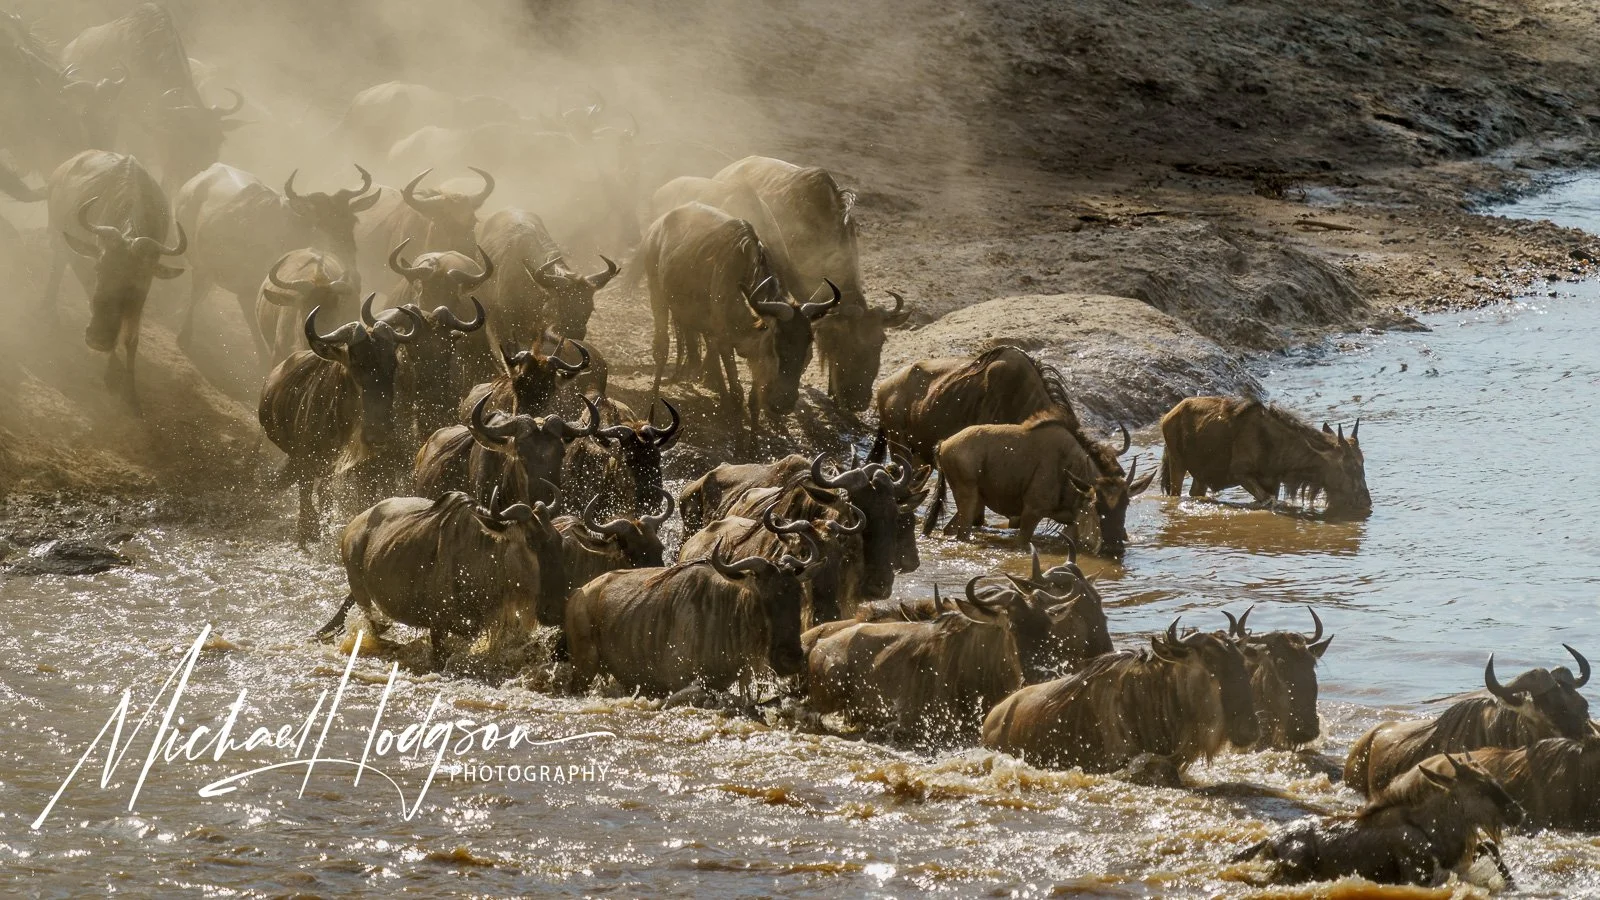
Wildebeest surge toward the Mara River during the Great Migration in Kenya’s Maasai Mara. Rapidly changing light and unpredictable animal movement make knowing your camera settings essential for capturing wildlife action. Photograph © Michael Hodgson. View photograph and print options.
Choose the right camera mode for wildlife photography
I prefer shooting in manual mode because it gives me direct control over shutter speed, ISO, and aperture. Depending on the lighting and how quickly conditions change, I may also use Auto ISO, letting the camera adjust sensitivity while I focus on the action. Other experienced wildlife photographers prefer shutter priority or aperture priority. The important thing is understanding how each mode works and choosing the one that helps you react quickly.
Shooting in manual means I choose shutter speed (how fast the shutter opens and closes), aperture (the size of the lens opening that lets in light), and ISO (how sensitive the camera's sensor is to light). Together, these three components are called the exposure triangle. Adjusting one affects the other two. Which means in full manual mode, you may have to quickly adjust up to three things manually – shutter speed, aperture, and ISO (or you can opt for “auto ISO” and only worry about two of the three). For this reason, some skilled wildlife photographers prefer to shoot in what is called “shutter priority mode” when working with fast-moving wildlife, which means they choose the shutter speed and the camera chooses what it considers the best aperture and ISO (so long as auto ISO is set).
The one thing I do not always do in manual when shooting wildlife is focus. Here, I almost always rely on autofocus, and I primarily choose zone focus with the focus mode set to continuous focus and tracking on (set for animal, bird, human, or other subject settings as your camera allows). I choose a “spot focus” or single-point focus mode (a narrow focus point) to get the best result when the subject is in trees or tall grasses, and my camera can't find the right focus point. I don't rely on autofocus when I am shooting macro (i.e., close-up) or when the animal is, for example, peering out from behind a bush. In these instances, manual focus typically works best, as autofocus tends to focus on the bush or leaves rather than the animal or its eyes.
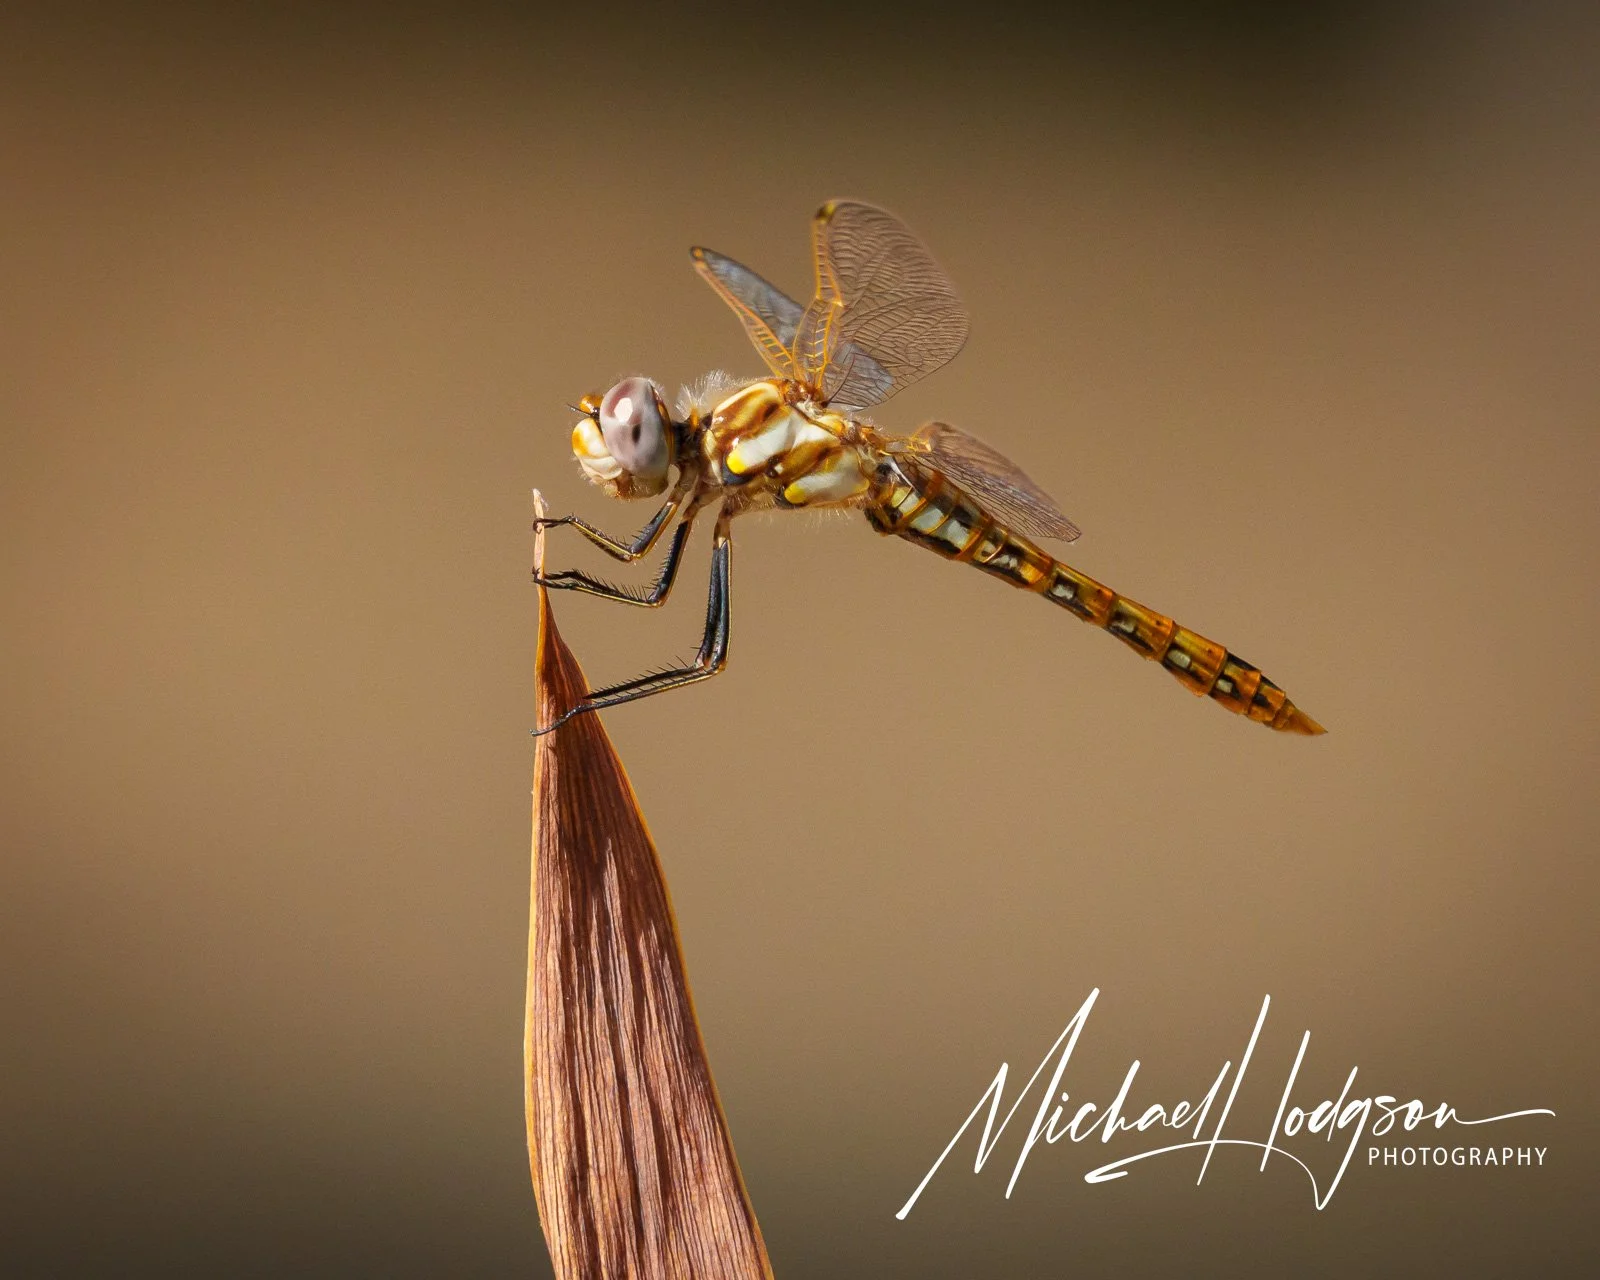
A variegated meadowhawk dragonfly (Sympetrum corruptum) photographed at close range using manual focus, a shutter speed of 1/1000 second, and an aperture of f/10. Precise focusing is especially important when photographing small wildlife subjects. Photograph © Michael Hodgson.
The shutter speed you choose may affect sharpness in your wildlife photos
Even wildlife that seems motionless can suddenly turn its head, or its fur or feathers can get ruffled by the wind. Any movement, no matter how small, can make an image look slightly out of focus if your shutter isn’t fast enough. Which is why so many of my shots early in my wildlife photography journey seemed soft or fuzzy – I was shooting at a shutter speed that was too slow. Now, even if I am using a tripod with a gimbal head (i.e., a special tripod head that balances camera and lens weight so the camera moves smoothly, both vertically and horizontally), I will most often opt for a fast shutter speed to ensure any movement of my subject doesn’t affect the sharpness of my image. In general, this means a shutter speed of 1/1000 for animals standing still, 1/2500 for animals moving slowly, and 1/3200 or more for fast-moving animals or birds in flight. Of course, the faster the shutter speed, the less time light hits your camera sensor, so you will need to compensate by shooting with a wider aperture or higher ISO to let in maximum light.
Recommended shutter speeds for wildlife photography
These shutter speeds are useful starting points for photographing wildlife. Adjust your settings based on available light, subject movement, focal length, and the effect you want to achieve.
| Wildlife subject | Suggested shutter speed |
|---|---|
| Resting mammals | 1/250–1/1000 sec. |
| Walking animals | 1/1000–1/2000 sec. |
| Running mammals | 1/2000–1/3200 sec. |
| Birds in flight | 1/2000–1/4000 sec. |
| Fast wildlife action | 1/3200 sec. or faster |
These are starting points, not fixed rules. Slower shutter speeds can also be used creatively to capture motion blur or panning effects.
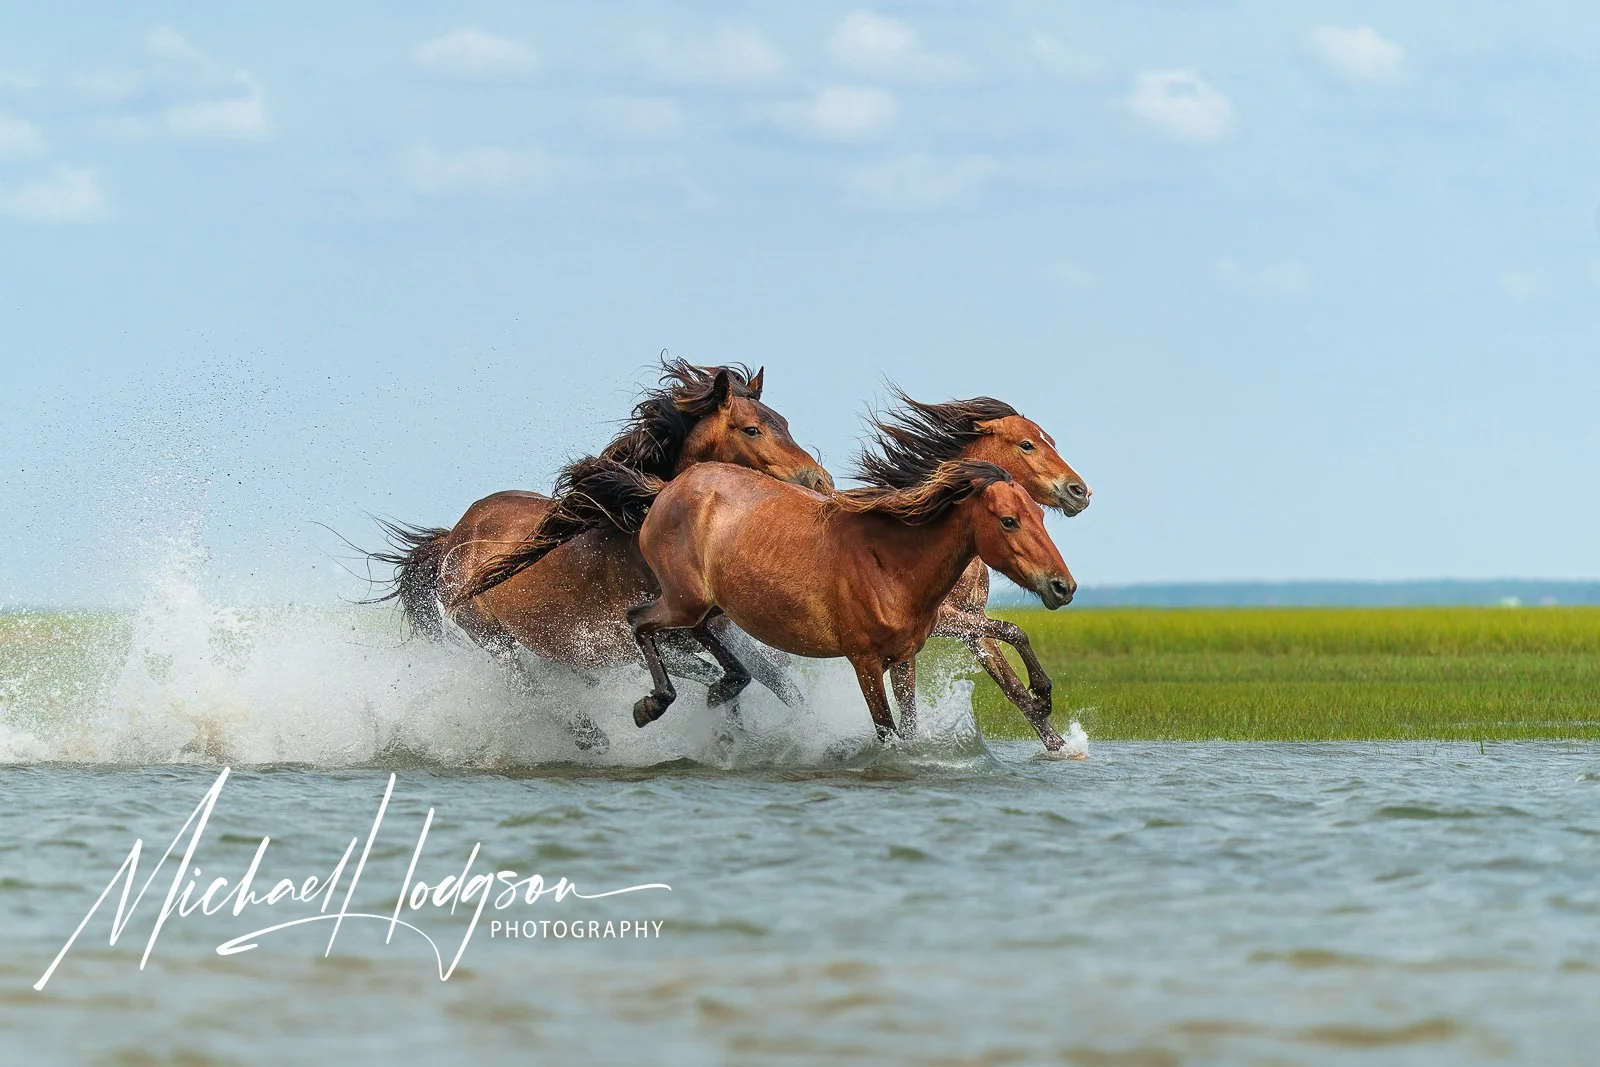
Wild horses gallop through shallow coastal waters at Shackleford Banks, North Carolina. Photographing from a low camera position with a 1/1000-second shutter speed helped capture the splashing water and the horses' movement. Photograph © Michael Hodgson. View photograph and print options.
Focus on the animal’s eyes
Eye contact draws a viewer into your photo. Even if much of your animal is soft or out of focus, sharp eyes can still make the photo strong. In the photo of the California Newt, below, I lay on my belly to get at eye level with the newt, and I made sure that the eyes were sharp, which draws the attention of anyone looking at the photo.
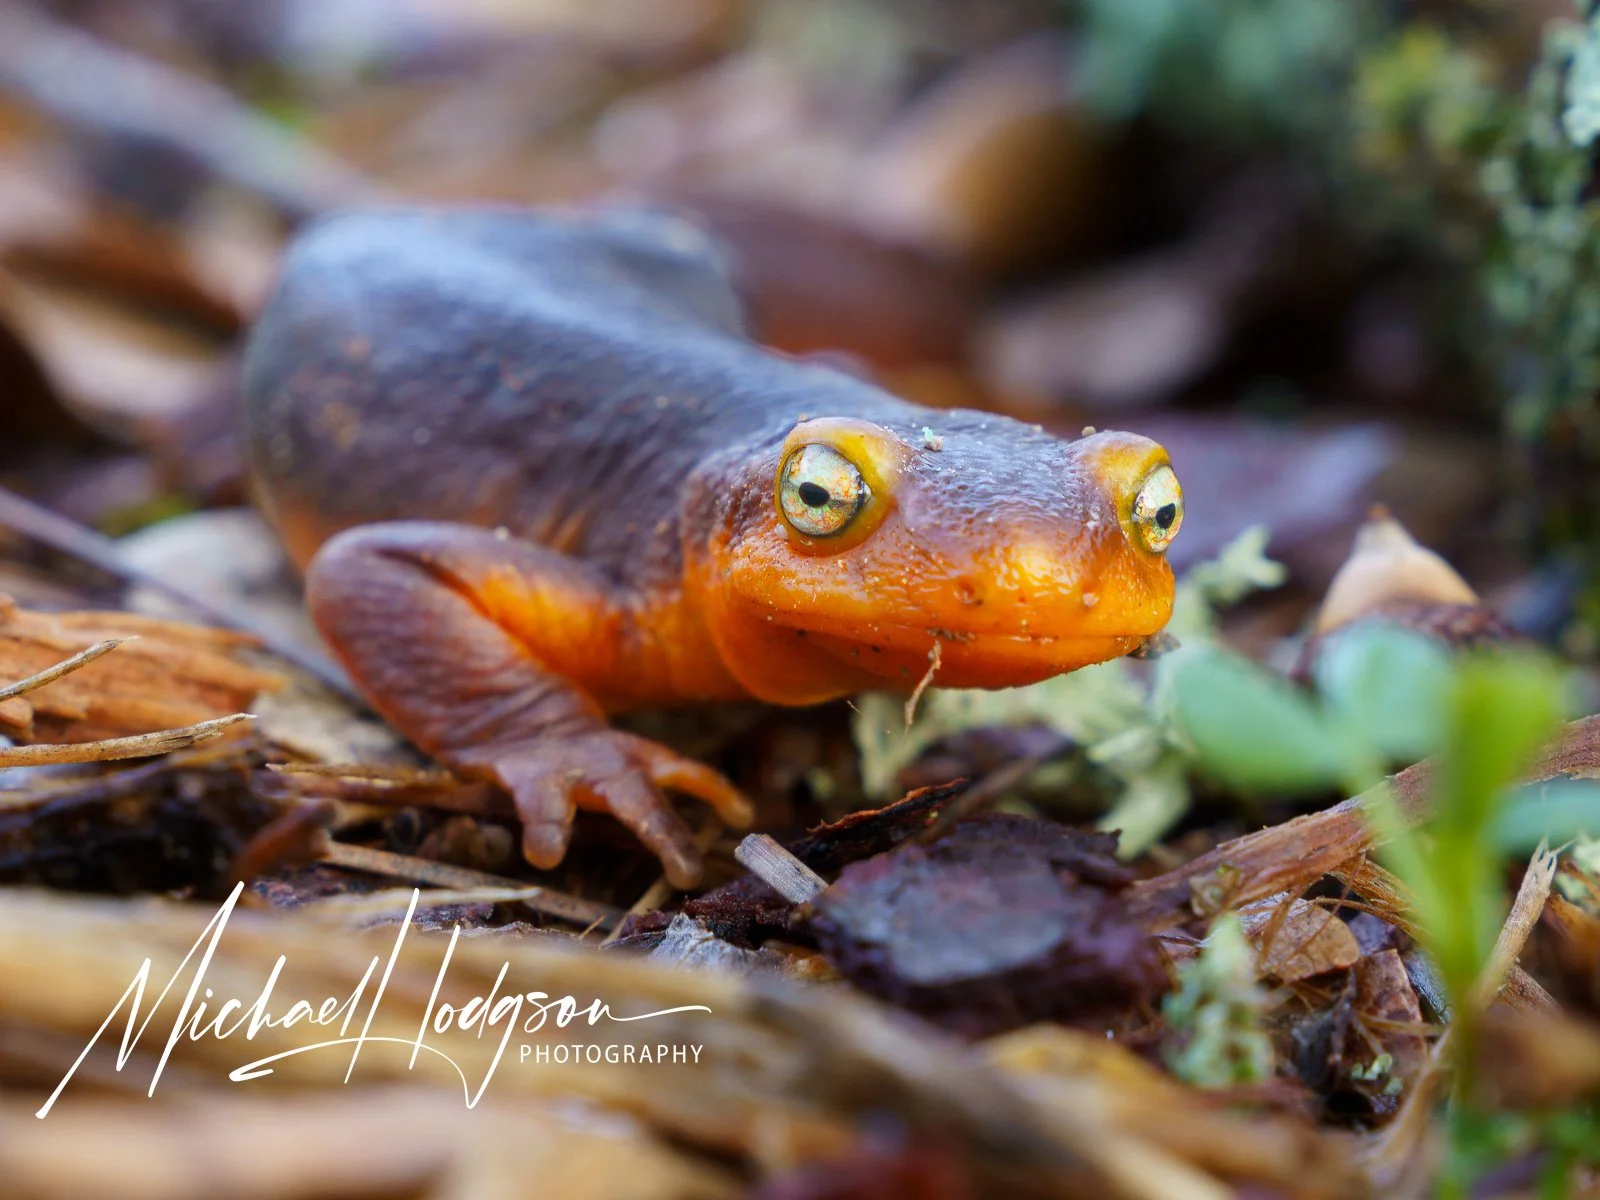
A California newt (Taricha torosa) approaches my camera on a rainy day in California’s Sierra Nevada foothills. Photographing at eye level and focusing carefully on the newt’s eyes creates a more intimate wildlife portrait. Photograph © Michael Hodgson.
Get low for more compelling wildlife photographs
Too many photographers stand and shoot, then wonder why their photos look like snapshots and lack the wow factor they hoped for. Get your lens at the same level, or lower, than the eyes of the animal you are trying to shoot. In the lioness shot below, I talked with our driver in the Maasai Mara and asked him if we could put our vehicle in front of the lioness and in a slight depression so that if she kept walking in the direction we all thought she would, I would be shooting up at her as she walked over the rise and toward the camera lens. This photo was recognized by the International Food Wine and Travel Writers Association with a gold medal in its 2022 photography competition, and by the the Professional Photographers of America as not only a photograph of merit in the 2022 International Photographic Competition (IPC), but also one of the selected merit photographs chosen to be part of the PPA’s Imaging Excellence Collection – showcasing the “best of the best from the IPC.”
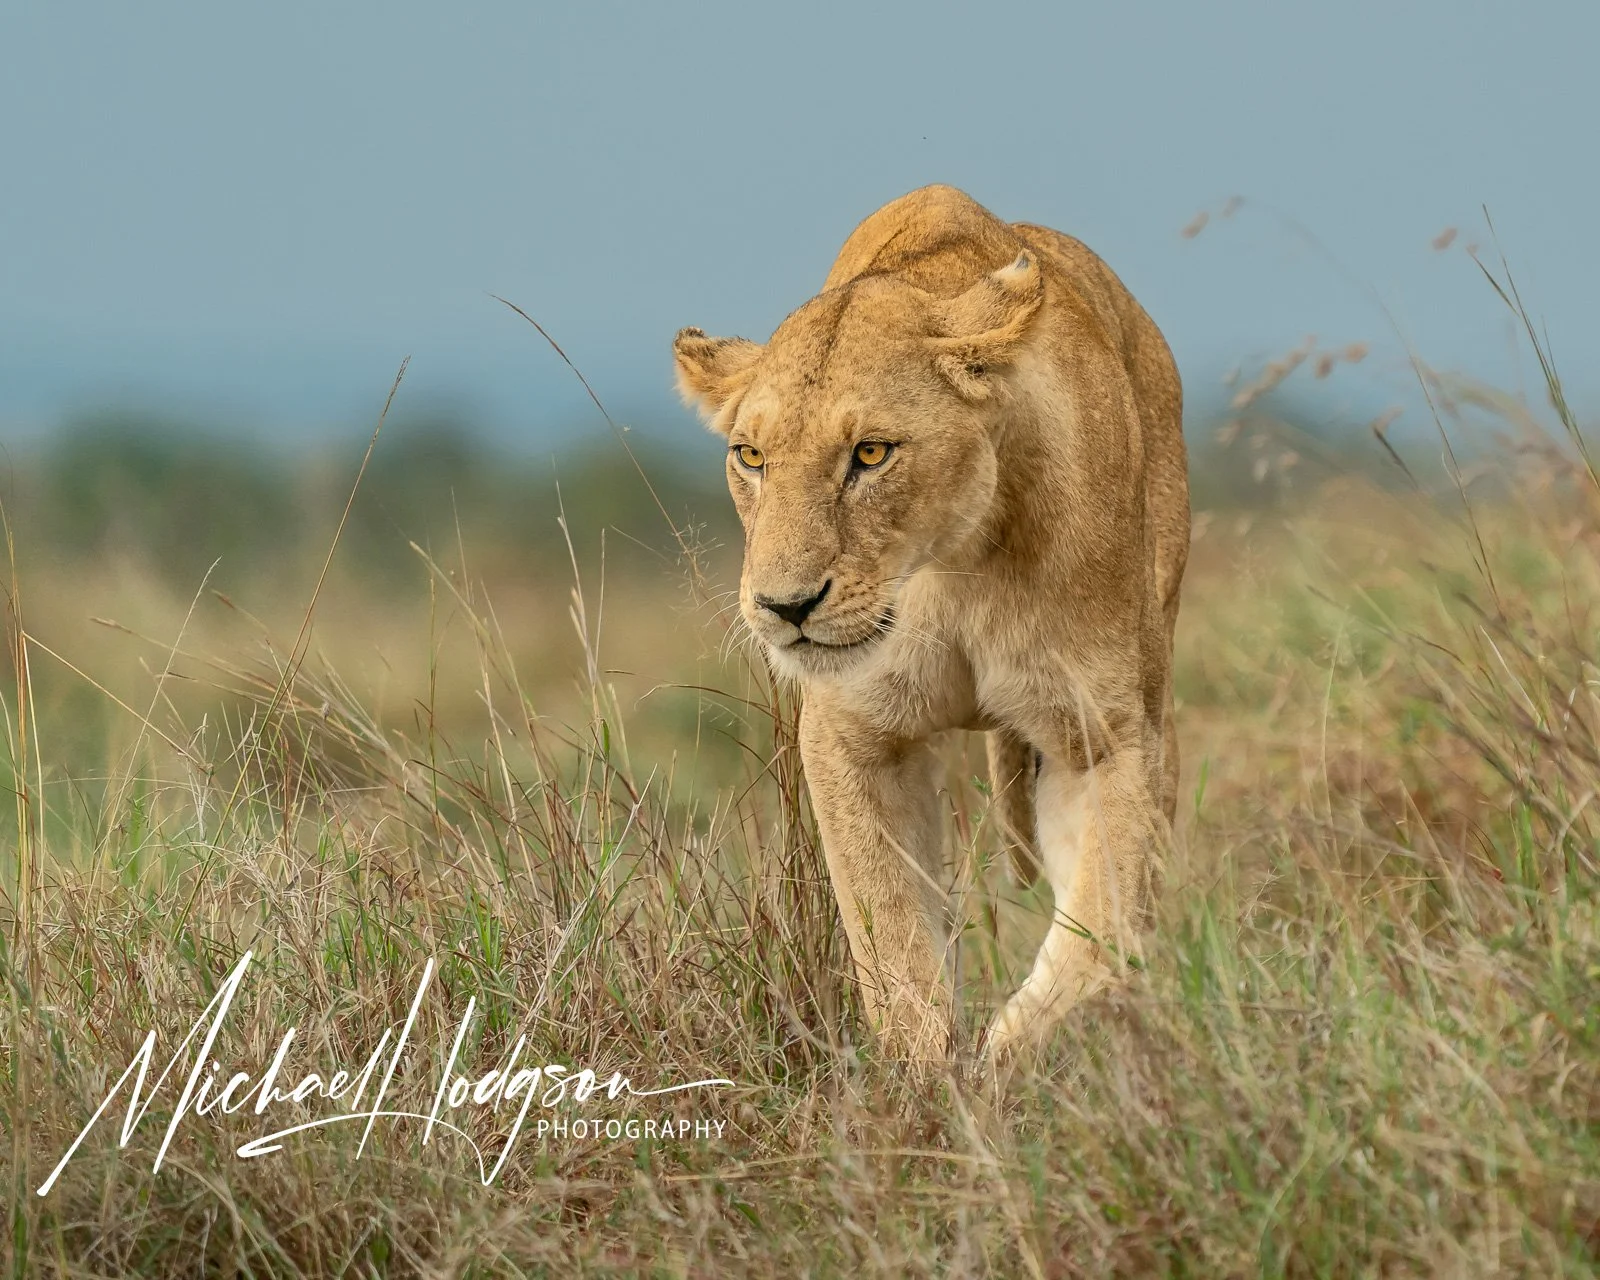
An African lioness (Panthera leo) walks through tall grass in Kenya’s Maasai Mara as the sun sets. Positioning the camera below the lioness’s eye level created a stronger perspective and eliminated distracting safari vehicles from the background. Photograph © Michael Hodgson. View photograph and print options.
Pay attention to backgrounds in wildlife photography
The background in good wildlife photography is just as important and, in some cases, perhaps a bit more important than the subject itself. Distracting elements – for example, parts of a building, branches coming out of the subject’s head or back – will detract from the quality of your photo, no matter how amazing the animal image. The human eye naturally gravitates to objects in the background as well as bright spots or even words.
Blurring the background in your image by shooting wide open (with an aperture at the lowest number your lens allows, such as f/2.8), will also keep the focus on the animal, but don’t forget to consider what color the background is. No point in placing a wonderfully colorful bird against a background that has the same or similar colors in it. Go for contrast here, like I did with the image of the American Oystercatcher in flight below. I positioned myself low, so green grasses and trees would be the background as the Oystercatcher took off. Far better than standing and having neutral sand from the beach as my background.
Aside from changing your perspective for a more eye-catching photo, another reason to go lower is to solve a background problem or to place a bit of grass or something else in the foreground to add a sense of depth and perspective to the image. If I’m shooting an animal and there are people, vehicles, or buildings in the background, I find quite often if I get down on the ground and shoot up, I can eliminate the distracting elements and focus on what I want in my photo – wildlife and a nice clean background. In the photo above of the lioness, there were plenty of other safari vehicles around. If I had I shot from a higher vantage point, they would have appeared in my photo.
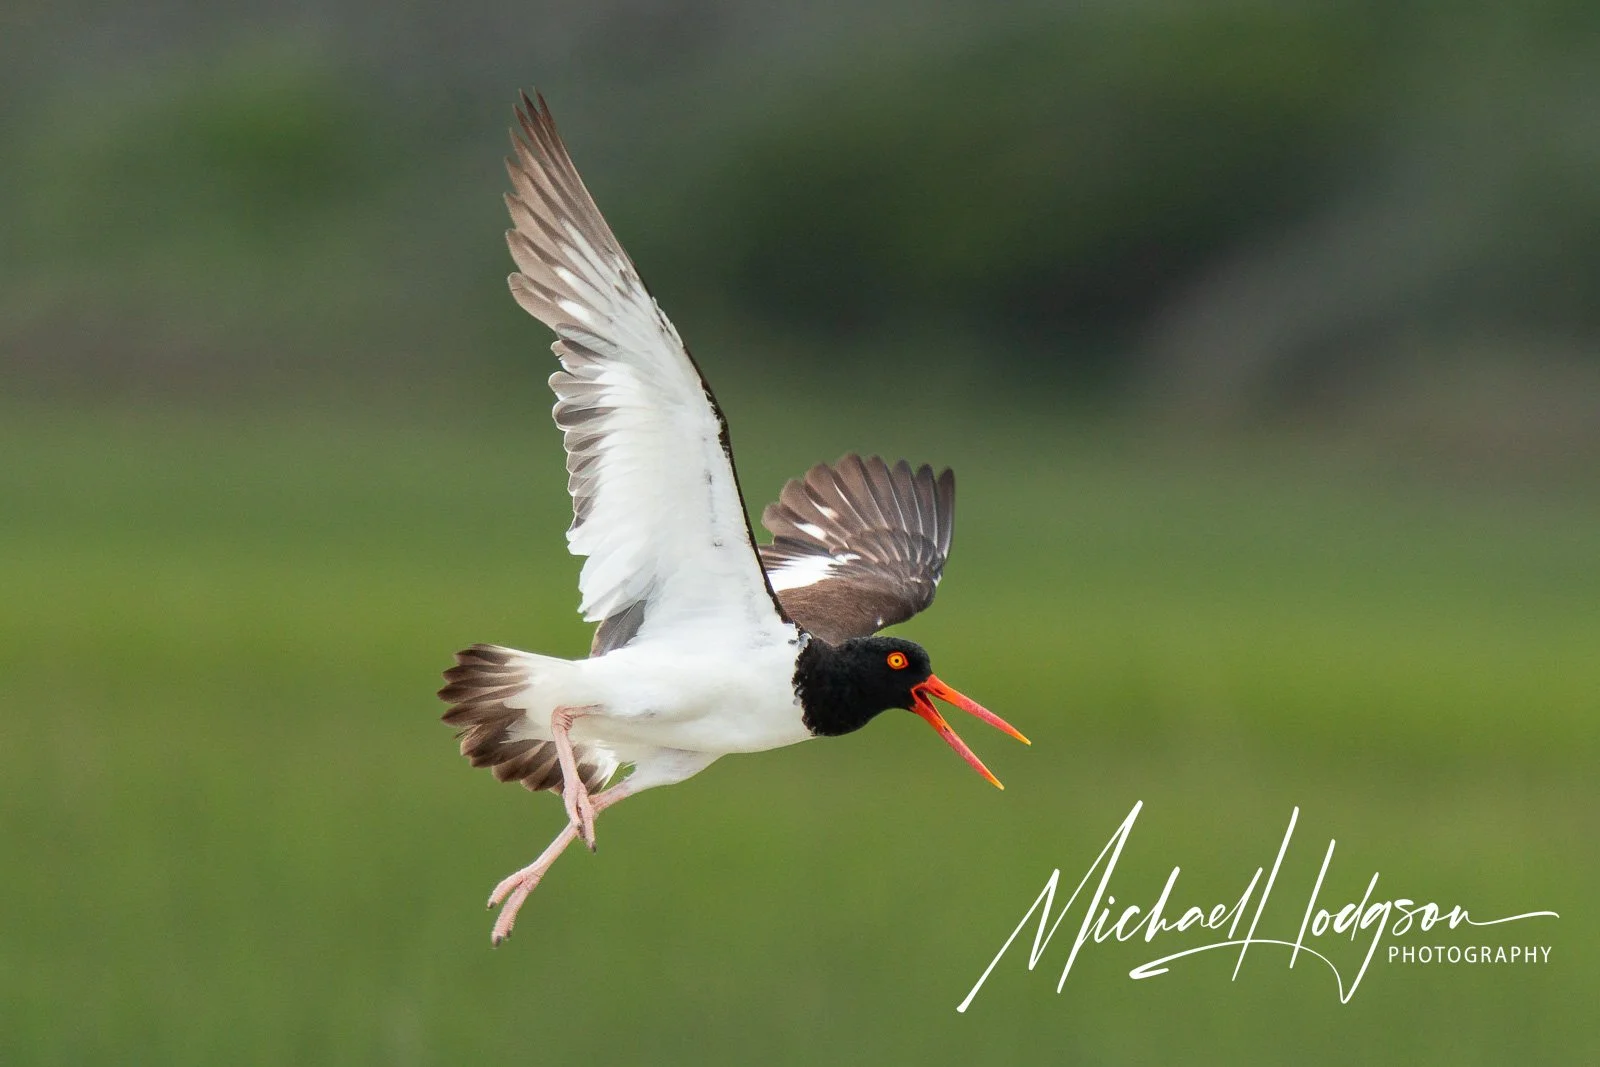
An American oystercatcher (Haematopus palliatus) takes flight along the North Carolina coast. Photographing from a low position placed green vegetation behind the bird, providing stronger color contrast than the sandy beach. Photograph © Michael Hodgson.
Photograph wildlife in all kinds of weather
If it is raining or snowing, don’t stay indoors and wait for better weather to photograph wildlife. The animals are all outdoors, doing their thing, and so should you! The photo below, of a Thomson’s Gazelle, was taken in a downpour during a photo safari in the Maasai Mara and adds a wonderful level of moodiness to what might otherwise be a quite ordinary scene. The judges in the 2022 California State Fair photography competition thought so, too, recognizing the image as a “photo of merit.”
Just be sure your camera gear is well protected when shooting in the rain. I rely on Think Tank rain gear for my camera and often stow extra lenses and my second camera body inside a lightweight dry bag in my pack for added protection if the weather looks like it will be wet.
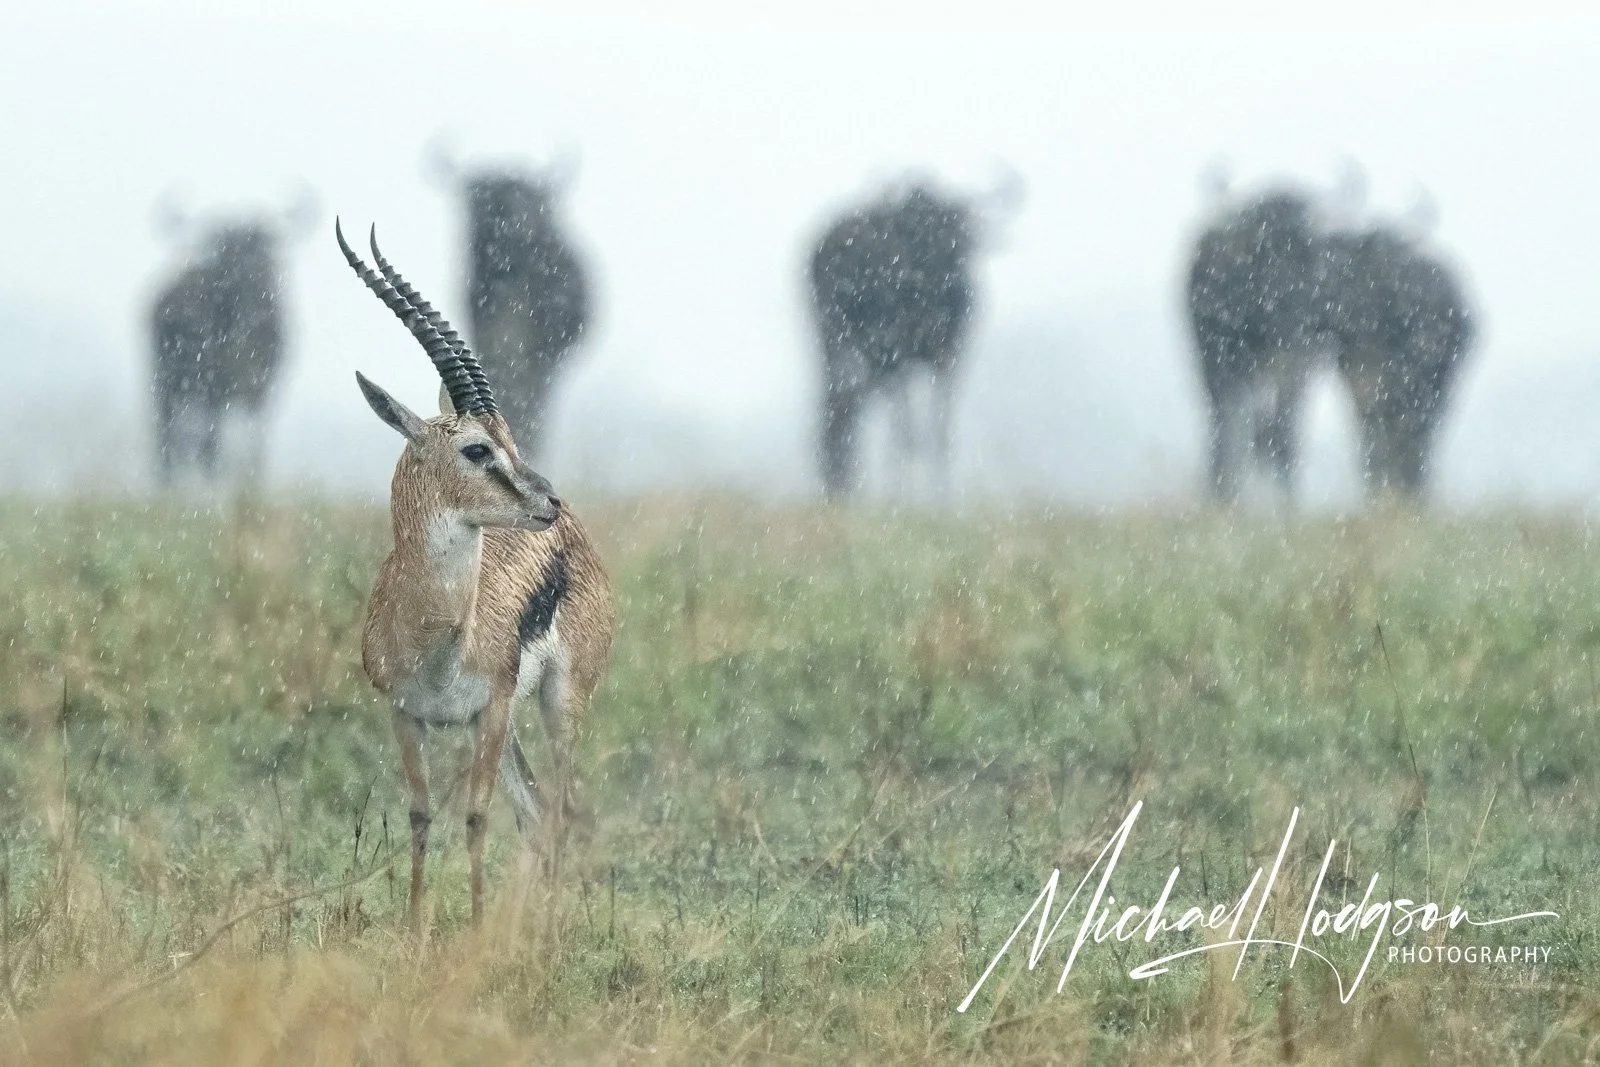
A lone Thomson’s gazelle stands before a herd of wildebeest as rain sheets down in the Maasai Mara, Kenya. This photograph won a “photo of merit” award in the 2022 California State Fair photography competition. Photograph © Michael Hodgson.
Learn animal behavior to anticipate the action
One thing I also love about wildlife photography is being able to spend time observing animals in their natural habitat. Good wildlife photographers are also good naturalists. Before you head out on a safari to shoot brown bears in Alaska, or to the beach to photograph shorebirds, take time to learn about the animals you may encounter. Learn an animal’s behaviors, body language, and how it hunts, feeds, and moves. If you know how an animal will behave, you can anticipate its actions. Photographs of animals moving, flying, hunting, eating, or playing lead to photos that are compelling, not just another image of an animal standing and staring into space.
With the brown bear below, I knew from observing it for a while that it would charge through the water and then make a last-second leap to swipe at a salmon swimming near the surface. It did this time and time again. I put myself in position and waited, staring through the viewfinder with the bear in frame until I saw the behavior begin and could capture the action.
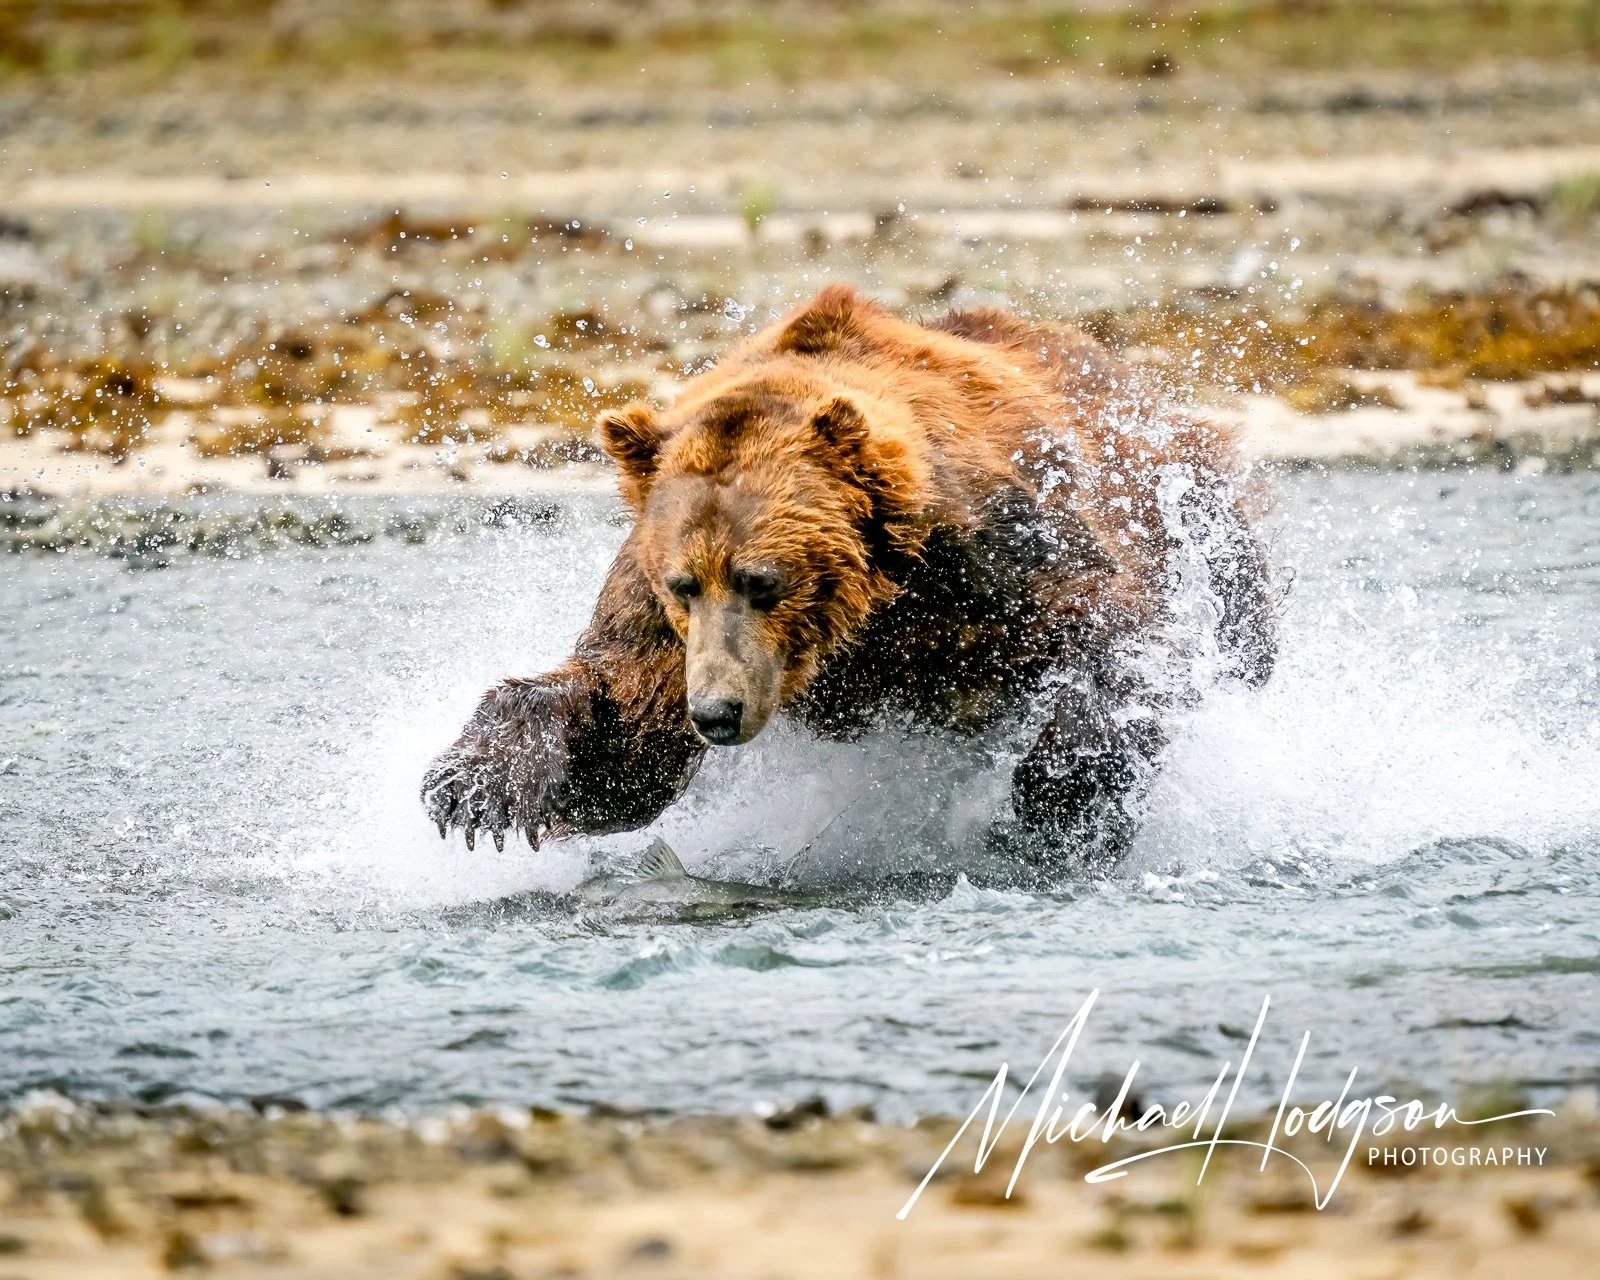
A coastal brown bear (Ursus arctos) charges through shallow water in pursuit of salmon in Alaska. Observing the bear’s repeated hunting behavior allowed me to anticipate the action and capture the moment before it struck. Photograph © Michael Hodgson. View photograph and print options.
Be patient and respect wildlife
That brings me to my final tip: To succeed at wildlife photography, you need patience. Bucketloads of it. It is exceedingly rare that a photographer simply shows up, immediately sees, for example, an osprey pulling a fish out of the water, and snaps the photo. It does happen (a good reason to always have a camera handy). But all too often, you will find yourself sitting for hours, hidden and ready for an elusive fox to appear as it has for the last five nights. And then the fox doesn’t come this time, or the light is all wrong when it does, or the weather doesn’t cooperate, and a storm chases you away. Patience.
To photograph the wild horses galloping, I spent more than a few hours standing in waist-deep (or sometimes chest-deep) water, with my camera mounted on a tripod and lens just above the water, waiting and watching. Horses spend a lot of time sleeping and eating. But if you are ready to watch and observe their behavior, the magic of wild horses galloping together can happen.
It is also worth pointing out that with patience comes respect. Respect for the wildlife you encounter. As a wildlife photographer, I have always felt happy when I get a photo of my animal subject doing what it does naturally. If not, it was still a great day outdoors. I have no respect for any photographer who throws things at animals to make them run or fly, offers wildlife food to get them to come closer, or has friends work to drive the animals toward the camera. In a perfect world, an animal should never know you are there, and if it does, it should never feel threatened by your presence.
Lastly, if you’re planning to photograph wildlife in Africa, understanding animal behaviors and knowing how to take wildlife photos is only part of the preparation. My guide to making the most of an African photo safari covers additional ways to prepare for photographing wildlife in the field.
Capturing better wildlife photographs starts with you
Better wildlife photography isn’t necessarily about having the newest camera or the longest lens. It’s about understanding your equipment, paying attention to light and composition, learning how animals behave, and being ready when something happens.
Some of my favorite wildlife photographs came after hours of waiting. Others happened in seconds. The common thread was preparation, patience, and knowing when to press the shutter.
You can explore more of my wildlife photography, including images of bears, big cats, birds, elephants, and other animals photographed around the world, in my Michael Hodgson Photography portfolio. Fine-art prints and image licensing are available.
